Sunday 17th November 2019
![]()
November is always birthday month in my family with all 3 of my siblings and my mum’s birthdays being this month! November is also the month where I am the poorest because of the slew of birthdays and is generally why people get food-related gifts for Christmas from me.
This weekend has been my mum’s birthday weekend and let me tell you, it was a very food heavy weekend. Between lasagne, brunch, deep fried brie, toad in the hole and a raclette, I think I have consumed enough food to last me a week. Oh, and enough cheese to last me the rest of the month. Although the cheese was absolutely amazing and makes me drool just thinking about it!
![]()
No birthday weekend is complete without cake. To be honest, no celebration is complete without cake and you can turn absolutely anything into a celebration by making cake.
It’s a very good way to live life.
Cake makes absolutely everything better.
![]()
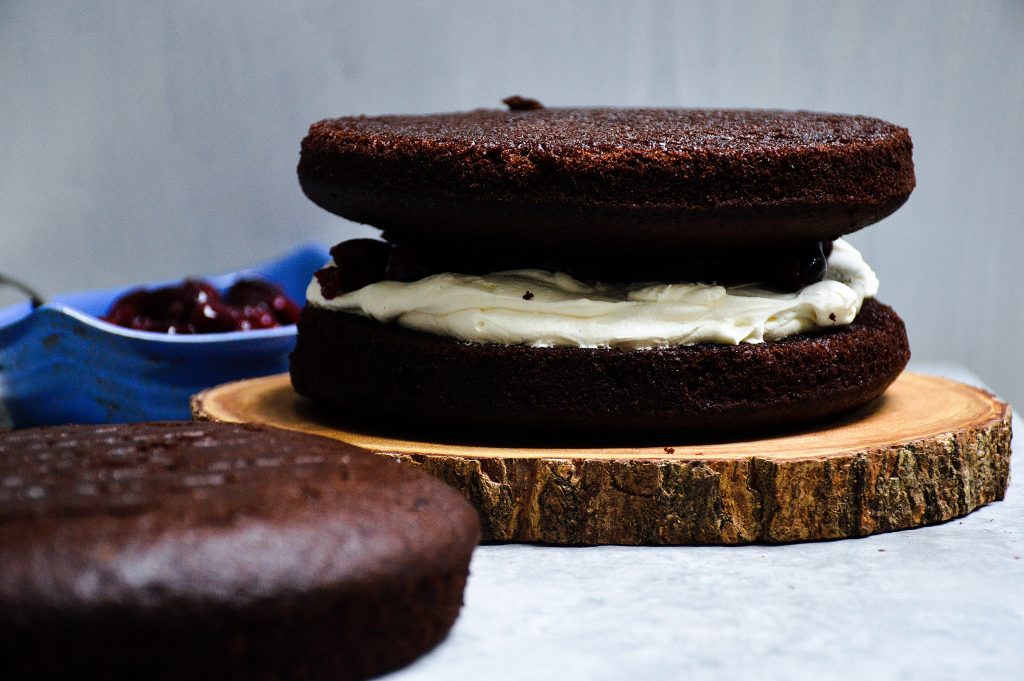
Black forest cake is one of my mum’s favourite types of cake and it is such a fun cake to make. Last year I made black forest cupcakes, and this year I decided to go a bit more all out! Hence the triple layered cake filled with plenty of cream and a homemade cherry pie filling. Which also goes very well on pancakes in case you were wondering.
This cake is amazing. It went down incredibly well with all of the family- including the fussy sibling who doesn’t like chocolate cake or cherries or you know, anything. The chocolate cake is quite a rich chocolate cake as there is a hefty amount of cocoa powder in it but it is moist from the cherry syrup that is brushed over the cake and it is just absolutely delicious.
![]()
The cake batter is quite a runny mixture however it cooks really well, and also very quickly. These cakes took 15 minutes in the oven which is pretty fast for layered cakes.
A tip for baking cakes more evenly is to make a dip in the centre of the cake so that when the cake rises, it rises more evenly, resulting in a flatter topped cake, although with my sister around, any spare cut aways never stay around for very long anyway.
This cake lasts for a couple of days and does have to be stored in the fridge due to the cream.
![]()
Ingredients:
For the Cake:
200g Self-Raising Flour
80g Cocoa Flour
225g Caster Sugar
3 Eggs
200ml Milk
175g Melted Butter
1tsp Vanilla Extract
1tsp Baking Powder
1tsp Bicarbonate of Soda
For the Cherry filling:
300g Cherries
50ml Water
1tsp Vanilla Extract
20g Caster Sugar
For the Cream:
600ml Double Cream
1tsp Vanilla Extract
Chocolate to decorate
Method
- Preheat the oven to 170°C and line 3 9 inch cake tins with parchment paper
- In a large bowl, beat together the sugar, melted butter and the vanilla extract until fully incorporated, adding in the eggs 1 at a time, beating them in completely before adding the next and then the milk, until the mixture is pale in colour and voluminous.
- Sift the flour, cocoa powder, baking powder and bicarbonate of soda in to the bowl and then fold in the flour until everything is incorporated.
- Divide the cake batter between the 3 cake tins, ensuring the cake batter is spread evenly in the pan (Tip: if you create a dip in the centre of the tin in the batter, it is much more likely to rise evenly) and then bake them in the oven for 15-20 minutes, until a skewer comes out clean.
- Whilst the cakes are baking, to make the cherry filling, put the cherries, water, sugar and vanilla in a saucepan and put it over a medium heat, cooking the cherries so that they breakdown a little. Once the cherries have softened and the syrup is bubbling in the pan, take the cherries off the heat and allow them to cool down completely.
- Once the cakes are out the oven brush the cakes with some of the cherry syrup to infuse some of the flavour and to help the cakes to stay moist.
- Once the cakes are completely cool, whisk the cream and vanilla together until it forms soft peaks. Construct the cake by topping one of the cakes with 1/3 of the cream followed by 1/3 of the cherries and some of the syrup before placing the second cake layer on top and repeating this process until the cake is constructed.
- Grate some milk chocolate over the top of the cake to complete
![]()